When visiting the Cracker Barrel restaurant, you will find a 15-peg triangle board game on each table. This page describes how to solve the puzzle from any starting position.
Update: June 2021. Moved from web page to blog and added solutions for finish position equal start position.
The game board is a triangle with 15 holes in the same shape as bowing pins, except with an extra row. The game starts with pegs (golf tees) in all the holes except one; the goal is to jump pegs one at a time, removing the jumped peg until only one peg remains. The instructions on the board say that if you leave only one peg, you are a genius. I suspect that the genius title is overstated, but if you follow the instructions on this page and you’re sure to impress the family!
For the pages that follow, the puzzle is viewed in this orientation and the hole numbers referenced.
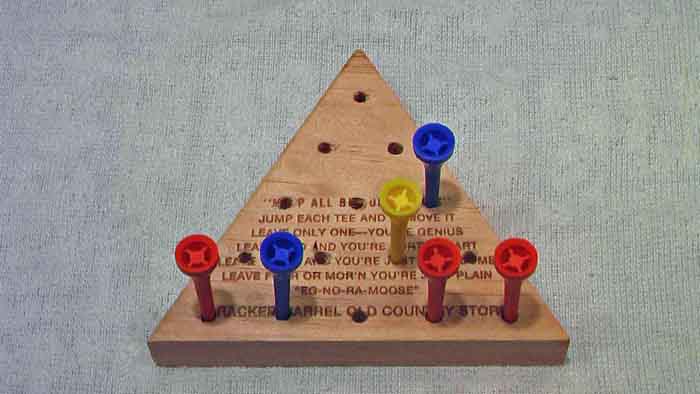
Photographs follow showing the board from start of game through completion.
The normal starting hole (empty hole) is hole #1. The initial discussion on this page shows how to solve the puzzle with hole #1 empty. That is followed by instructions on how to solve for the other starting positions, with the happy addition that most of the starting positions are just variations of the standard #1 start. After 3 moves, they all look the same; except the evil #5!
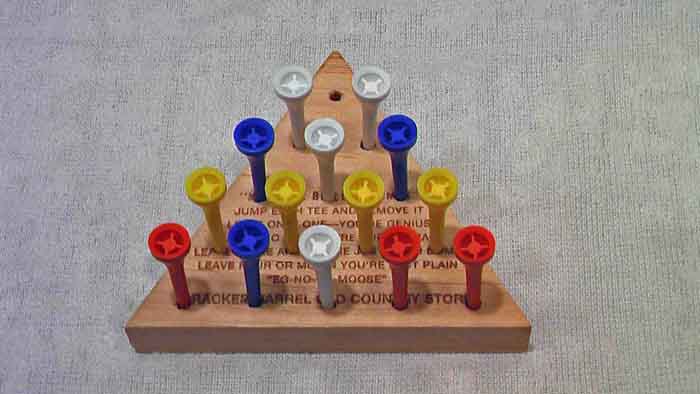
The first 3 jumps are: 4-1, 6-4 and 1-6. With these complete, the “magic” base follows. This shape will be referenced later in this document as the “goal position” for the other variations of the game using different starting holes. Learning to solve the puzzle from this point is the key to success with the game.
The next moves, 7-2, 13-4 and 2-7. This shape is not too critical, the photo just shows the puzzle progressing.
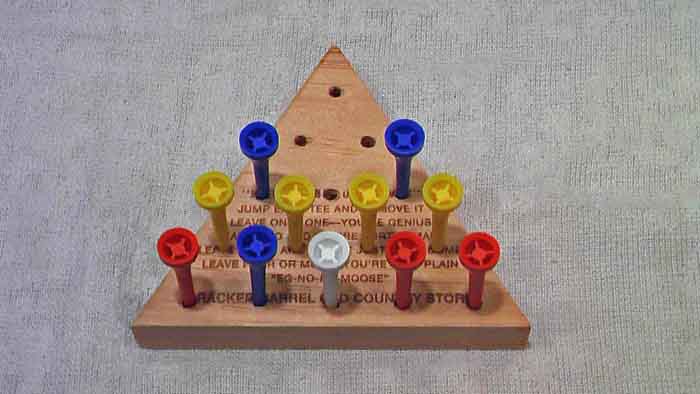
The next steps are to clear the second from bottom row (the yellow tees) and the bottom row.
First, 10-8, 7-9 clears the second row.
15-13 and 12-14 clears the bottom. To mix it up, jump them in reverse and it won’t look like you’re solving the puzzle the same way every time.
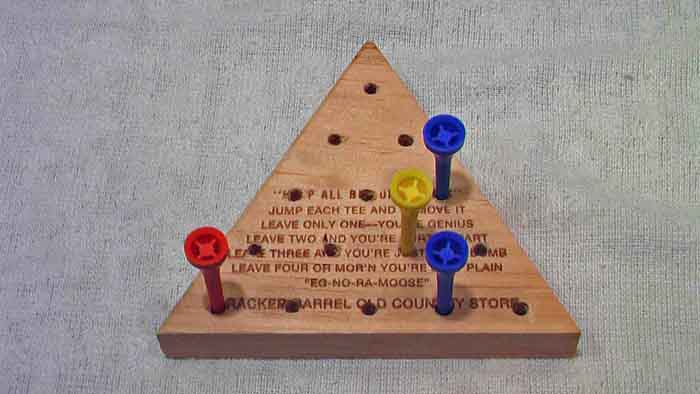
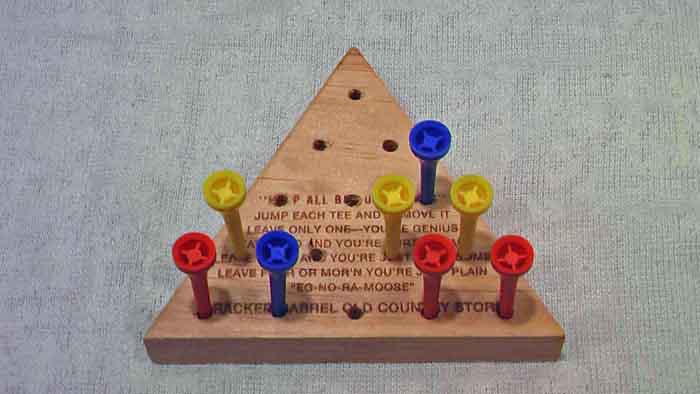
Almost there, the diagonal jump clears all but the bottom of the puzzle and the bottom clears “easy”.
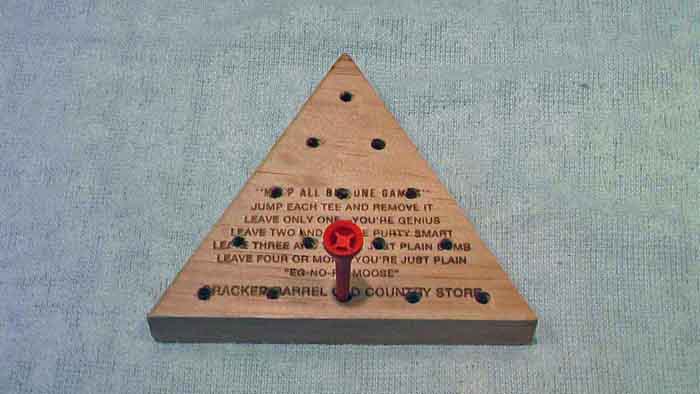
6-13, 14-12 and 11-13 ==> Winner!
Starting position (1) – Full solution
| 4 | 1 |
| 6 | 4 |
| 1 | 6 |
| 7 | 2 |
| 13 | 4 |
| 2 | 7 |
| 10 | 8 |
| 7 | 9 |
| 15 | 13 |
| 12 | 14 |
| 6 | 13 |
| 14 | 12 |
| 11 | 13 |
For the other starting positions (except position 5 which we will cover later), the same solution is used after the third jump. The “trick” is to get to the same pattern after the first three moves, the goal shape. From there, solve solve as if it were starting position 1. Notice that there is only one sequence to remember as you can get to the goal position from any of the starting positions based purely on shape.
Here are the moves for “after” the goal position is reached.
| 7 | 2 |
| 13 | 4 |
| 2 | 7 |
| 10 | 8 |
| 7 | 9 |
| 15 | 13 |
| 12 | 14 |
| 6 | 13 |
| 14 | 12 |
| 11 | 13 |
How many starting positions are there?
There are 15 pegs in the board, but only 4 starting positions. For example, all the points are position “1”, even if they are otherwise called “11” or “15” the puzzle is the same once you rotate the board; even if only mentally. 2 and 3 are really the same if you view them “mirrored”. Even if seen backwards, after the first 3 moves, both line up for the same standard solution. Starting positions 4/6 are also swappable; 13 is the same as 4/6 once you rotate the board.
Here are all the starting positions.
| 1 | 1, 11, 15 |
| 2 | 2, 3, 7, 12, 10, 14 |
| 4 | 4, 6, 13 |
| 5 | 5, 8, 9 |
The neat thing to observe is that start positions 1, 2 and 4 and 11, 15, 3, 7, 12, 10, 14, 6 and 13 are really the same as they have the same solution once you get past the first 3 moves! This means that there are only 2 puzzle solutions that need to be memorized to solve all positions on the puzzle. If someone figures out how to get to the “magic” 3rd position when start with hole 5 empty, please let me know.
- Update June 10, 2021 – there is no set of moves to get to magic position from “5”
First three moves for starting position (1, 11, 15 — Collectively called “1”).
| Starting hole | Move 1 | Move 2 | Move 3 | Comments |
| 1, 11, 15 | 4-1 | 6-4 | 1-6 | |
| 2, 3, 7, 12, 10, 14 | 7-2 | 13-4 | 11-13 | Rotate right |
| 4, 6, 13 | 13-4 | 10-8 | 15-13 | Rotate left |
The middle holes
I have not found a method to get to the “same as the others” solution when start with hole #5 (aka 8, 9). A full solution follows and interestingly, it also ends with the final peg standing in hole 13; there must be a good reason. With practice, solving this “hard one” is really just remembering that there are only 2 possible first moves and this solution starts from the right, the next couple moves are filling the pegs just jumped over or from and the 4th is opening the middle hole on the right side of the triangle. From there, it pretty much solves itself! ?
| 14 | 5 |
| 7 | 9 |
| 2 | 7 |
| 6 | 4 |
| 7 | 2 |
| 1 | 4 |
| 15 | 6 |
| 3 | 10 |
| 12 | 14 |
| 10 | 8 |
| 4 | 13 |
| 14 | 12 |
| 11 | 13 |
Finish hole same as start hole
Feedback from reader Merv Eberhardt provides an interesting twist on the above solution. He wanted a solution where the last peg ends up in the same position which was empty at the start. Taking genius to a new level…
The solutions below achieve this goal, and I note that they all also achieve the magic diamond after 3 moves, so it is really the finish that is varied to move the ending position from hole 13 as is listed above to instead finish at the position which was empty at start.
| 1 (11,15) | 2 (10,12) | 3 (7, 14) | 4 (6,13) | ||||
| 4 | 1 | 7 | 2 | 10 | 3 | 13 | 4 |
| 6 | 4 | 13 | 4 | 13 | 6 | 15 | 13 |
| 1 | 6 | 11 | 13 | 15 | 13 | 10 | 8 |
| 10 | 3 | 14 | 12 | 12 | 14 | 3 | 10 |
| 13 | 6 | 6 | 13 | 4 | 13 | 12 | 14 |
| 3 | 10 | 12 | 14 | 14 | 12 | 4 | 13 |
| 15 | 6 | 15 | 13 | 11 | 13 | 13 | 15 |
| 7 | 2 | 2 | 7 | 3 | 10 | 15 | 6 |
| 11 | 13 | 1 | 6 | 1 | 4 | 1 | 4 |
| 14 | 12 | 10 | 3 | 7 | 2 | 7 | 2 |
| 12 | 5 | 3 | 8 | 2 | 9 | 6 | 4 |
| 6 | 4 | 13 | 4 | 13 | 6 | 2 | 7 |
| 4 | 1 | 7 | 2 | 10 | 3 | 11 | 4 |
Pingback: Triangle Peg Game – All Solutions – joenord.com
Wow, I had no idea you could win with one of the middle holes open from the start! I’ll have to try that next time, thank you!
The rewrite of my “end at start” solution lost something in its translation. There are three diamond patterns: 1/2/3/5, 7/8/11/12, and 9/10/14/15. I refer to them as D1, D2, and D3, respectively. D1 is achieved from starting positions 1, 7, 10, and 13. D2 from relative positions 11, 14, 2, and 6. D3 from 15, 3, 14, and 4. The solution table that you presented mixed the “families.” When grouped together they not only reveal their diamond relation, but their END AT START solutions are remarked similar to the point that only TWO solutions (with minor differences) result. I’ll send you a correction. Please publish: MervEberhardt@knology.net
Your table of END AT START solutions used starting positions 1, 2, 3, and 4. These lead to diamond patterns D1, D2, D3, and D3 (my designations), respectively. By using starting positions 1, 7, 10, and 13 the D1 pattern (1/2/3/5) would have resulted and their solutions would have shown remarkable symmetry. For 1 the moves to D1 are 4-1, 6-4, and 1-6. [From 7 the moves to D1 are 2-7, 6-4, and 1-6. From 10 the moves to D1 are 3-10, 4-6, and 1-4. From 13 the moves to D1 are 4-13, 1-4, and 3-8.] From there the next eight moves are 10-3, 13-6, 3-10, and 15-6 then 11-13, 14-12, and 13-5, then 7-2. The resulting 2/5/6 serve to solve not only the END AT 1 (6-4 then 4-1) but also the END AT 7 (6-4 then 4-7) and END AT 13 (2-9 then 6-13). Hence the END AT 1, 7, and 13 are the same except for the two final moves. The solutions for END AT 10 are similar but mirror images. From D1 the next eight moves would result in 3/4/5 with final moves to END AT 10 (4-6 and 3-10). It could also solve END AT 1 (4-6 and 6-1). MervEberhardt@knology.net
I would like to have the directions to leave one peg on each corner at the end of the game. Also how to have the board empty at the end of the game.