In setting up WordPress recently on this website, I discovered that getting SMTP working for blog email notifications was more complicated than I expected. This post shows the solution.
No, I don’t have the ability for anyone to post or comment yet, but someday that will come and it will be sure welcome to get notifications. In past, before moving to WordPress, I posted some nice content on things like how to tie boats up in canal for hurricane preparation, link. People commented and I saw the comments a month or more later. I send apologies to the folks that wrote comments that seemed to go into a black hole. Having notifications now working will allow me to be more timely in response and even will allow me to respond inquiries on “contact me”, assuming robots don’t send too much spam. Yes, they will. I know.
Convincing WordPress to send email notifications though was a tricky process. For starters, GoDaddy with CPANEL has TWO email systems:
- The right one, which is email system which is secureserver.net and
- CPANEL based site hosting of own mail server – yoursite.com/cpanel email accounts
The 1st one is the one needed to get email notifications to a place you can see them, so its the one to work with. The 2nd one is a distraction and will only send emails within your own domain. An interesting note is that in my prior usage of B2evolution, the automated setup of email in that tool configured the UNIX email system in “2”. This didn’t work but once I figured it out, wow were there a lot of emails in those invisible accounts.
Build an email account for sending messages
The first step is establishing an email address dedicated to this purpose and on GoDaddy, the way to define new email addresses is on the GoDaddy account management area, not in CPANEL of an individual domain. Logon at godaddy.com and then ignore the following panel in the top right which is a distraction. Hitting the main menu on the main website is NOT the way to define new email accounts. Here is the panel that you shouldn’t use.

The right place to define email address
The right place to define a new email address is https://account.godaddy.com/products. Scroll down, way down, and find Workspace Email. Click “Manage All”.

Now in the right place, define a new email address such as wpadmin@yourname.com or similar. Emails sent from blog system will come from this address. You should also set this up in your email program to verify it works. I note that it is POP3, not IMAP in my case and this has to be correctly configured or the email send/receive will not work. Once get the email account functioning, it is time to configure WordPress to send notifications via SMTP.
Configuring WordPress to send email
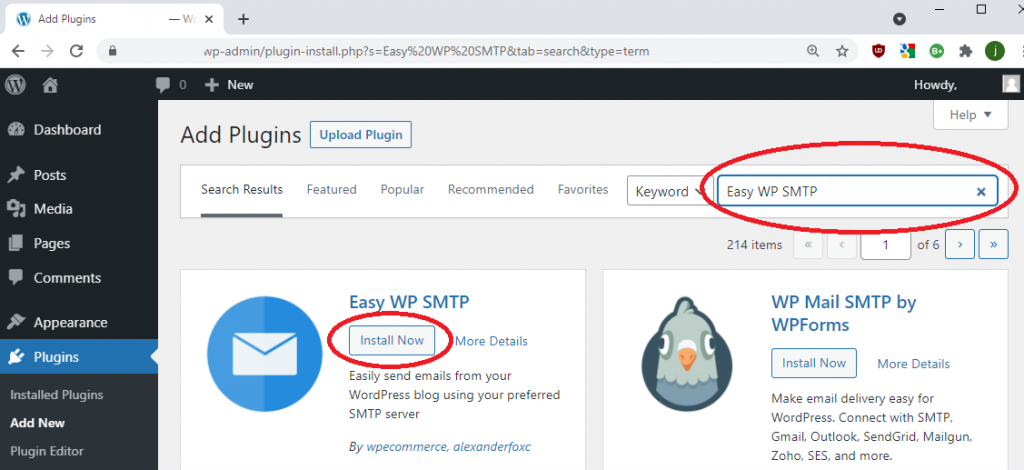
You would think this is as simple as installing a plugin in WordPress that knows how to use SMTP to send email, but there is more to it. A plugin is required and I selected Easy WP SMTP. The WordPress “Add Plugins” page looks like this.
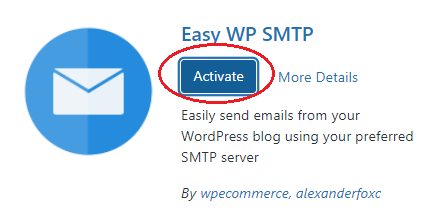
After installing the plugin, it must be activated
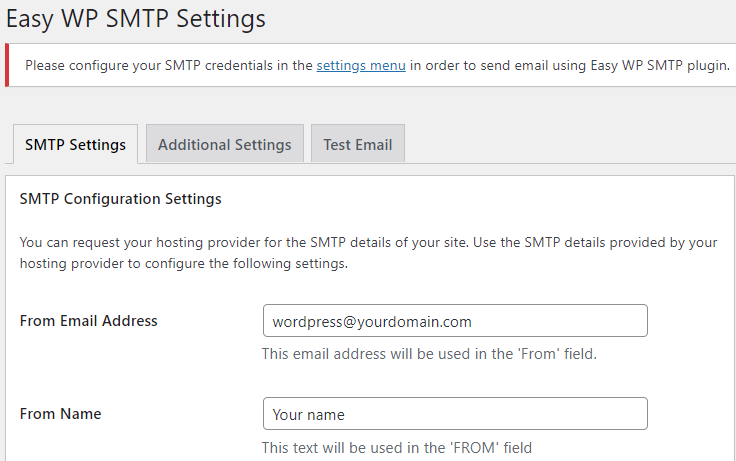
The next step is to configure the plugin to use the email address earlier created. The first page of the settings is straight forward.
The second page of the settings is where the issues arise and where I hope this blog can help other folks who have got caught by the same confusion as me.
For me, the critical piece of missing information was explained in this youtube video by David Repasky. In that post he covered additional items, but the key material for me was learning that the port for SMTP send via smtpout.secureserver.net should be port 80 and not 465! Thank you David.
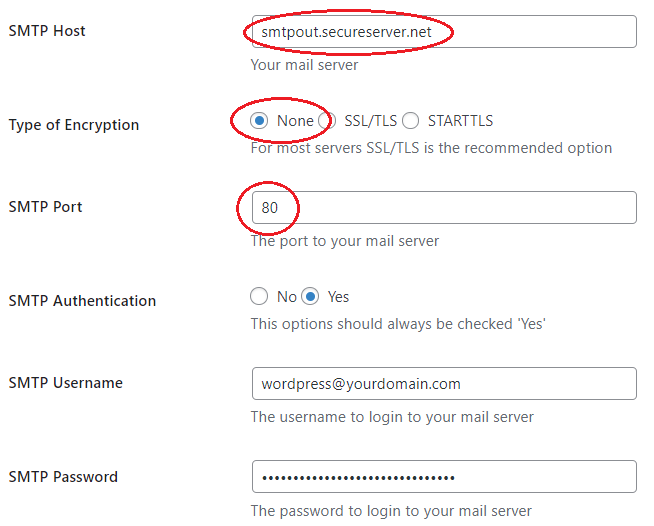
On the GoDaddy hosting, the UNIX machine hosting your website is close to local network and can talk to smptout.secureserver.net over ports that are not correct on the external Internet network. Notice that this means that information is traveling not encrypted on GoDaddy’s internal network segments. Is that a problem? I don’t know, but I must expect that GoDaddy have evaluated this configuration.
The final step is to send yourself a test message, as here.
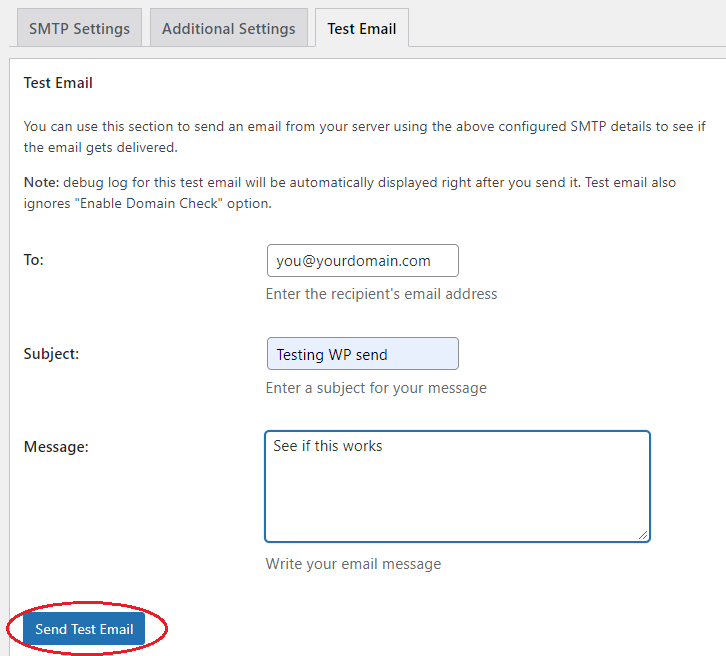
With Easy WP SMTP configured as above, the email comes straight through and arrives almost instantly.
This took some time for me to dig through. I hope this write up helps others.
Joe Nord

